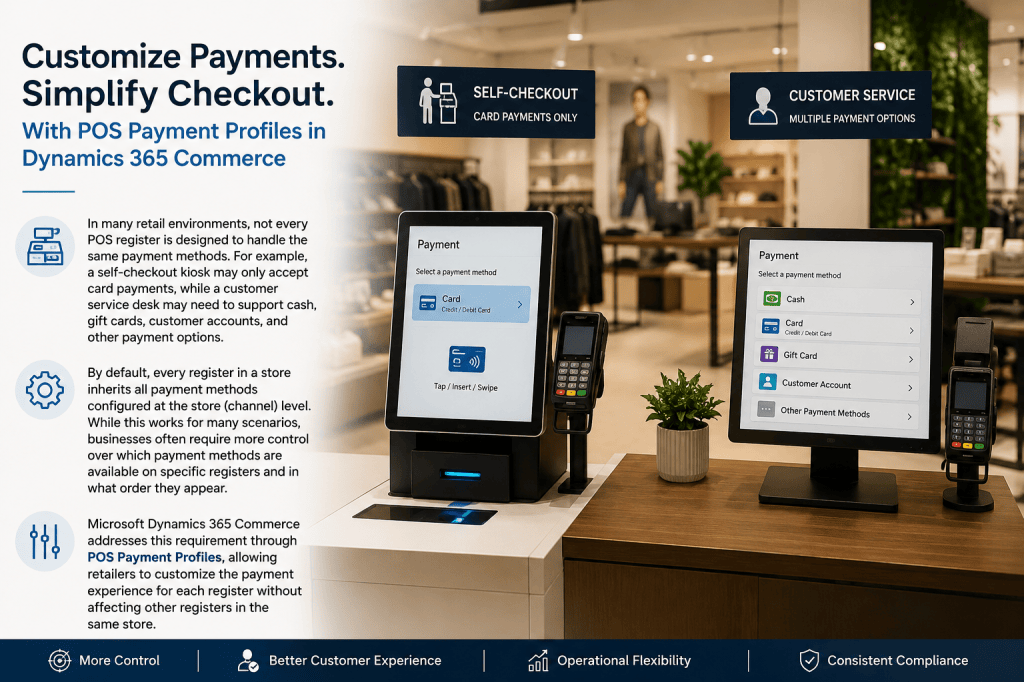
In many retail environments, not every POS register is designed to handle the same payment methods. For example, a self-checkout kiosk may only accept card payments, while a customer service desk may need to support cash, gift cards, customer accounts, and other payment options.
By default, every register in a store inherits all payment methods configured at the store (channel) level. While this works for many scenarios, businesses often require more control over which payment methods are available on specific registers and in what order they appear.
Microsoft Dynamics 365 Commerce addresses this requirement through POS Payment Profiles, allowing retailers to customize the payment experience for each register without affecting other registers in the same store.
Why Use Payment Profiles?
Payment Profiles allow businesses to customize the payment methods available for each POS register, creating a simpler and more efficient checkout experience. This is especially useful for scenarios such as self-checkout kiosks, customer service desks, express lanes, or any register that requires a different set of payment options. By displaying only the relevant payment methods and arranging them in the desired order, businesses can streamline cashier operations and reduce errors.
How Payment Profiles Work
The payment methods available on a register are determined by three levels of configuration:
- Store (Channel) Payment Methods
Defines all payment methods available for the store. - Payment Profile
Selects the payment methods from the store configuration that should be available for a specific type of register and defines their display order. - Register
Assign the Payment Profile to the desired register so it uses the configured payment methods.
Important: A Payment Profile cannot add new payment methods to a store. It can only use payment methods that are already configured at the store (channel) level.
How to Configure a Payment Profile
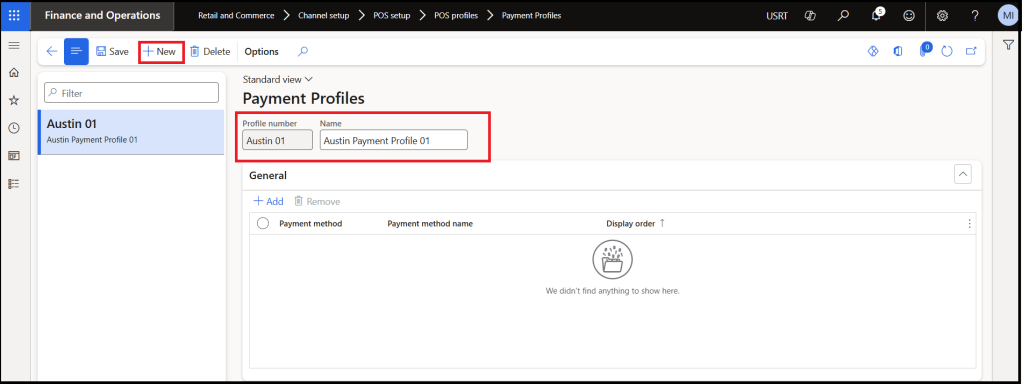
Step 1: Create a Payment Profile
Navigate to:
Retail and Commerce → Channel setup → POS setup → POS profiles → Payment profiles
Create a new Payment Profile that represents the register type.
Step 2: Add Payment Methods
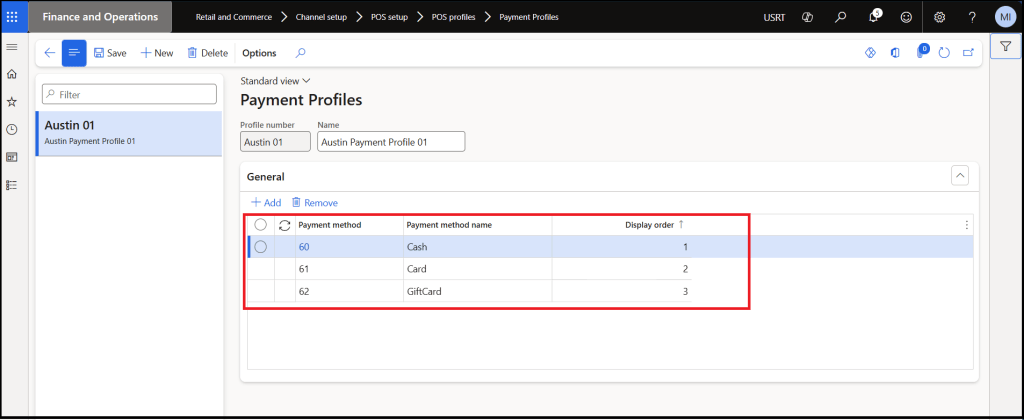
Add the payment methods that should appear on the register.
For each payment method, specify the Display Order.
The payment methods are shown in ascending order:
- 1 = First
- 2 = Second
- 3 = Third
This allows you to prioritize the most frequently used payment methods.
Step 3: Assign the Payment Profile to the Register
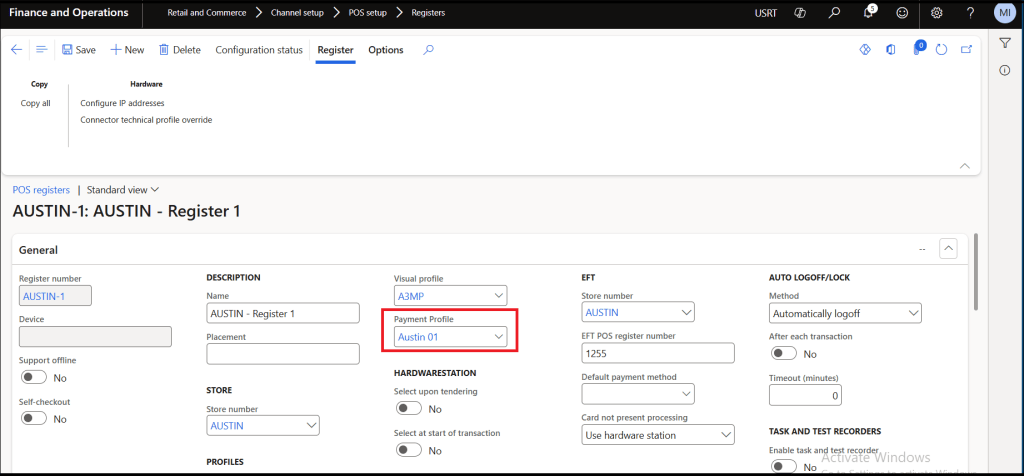
Navigate to the required register and assign the Payment Profile.
Path:
Retail and Commerce → Channel setup → POS setup → Registers
Under the General FastTab, select the appropriate Payment Profile.
Step 4: Synchronize the Changes
Run Distribution Schedule job:
1090 – Registers
This updates the register configuration so the new Payment Profile becomes available in Store Commerce.
Result in Store Commerce
After synchronization:
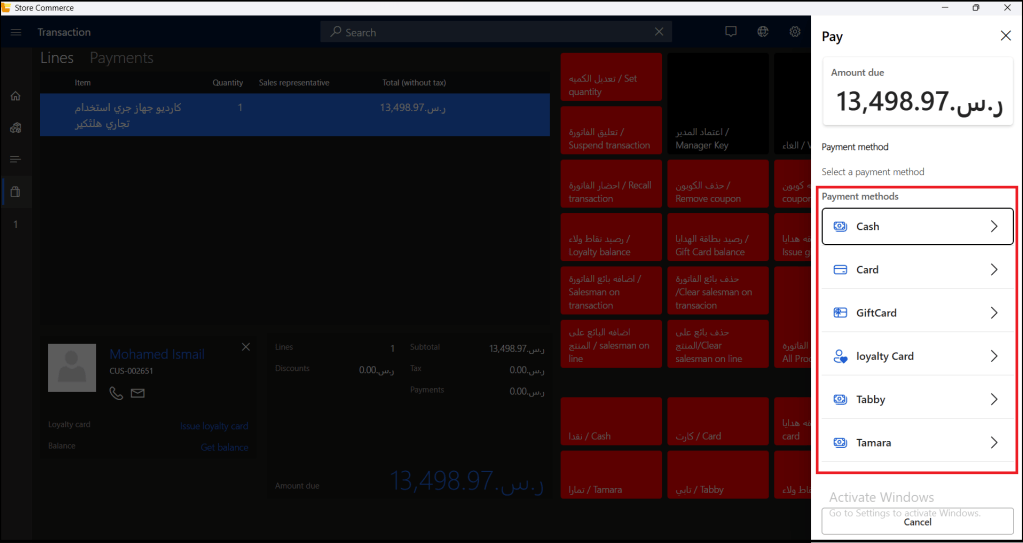
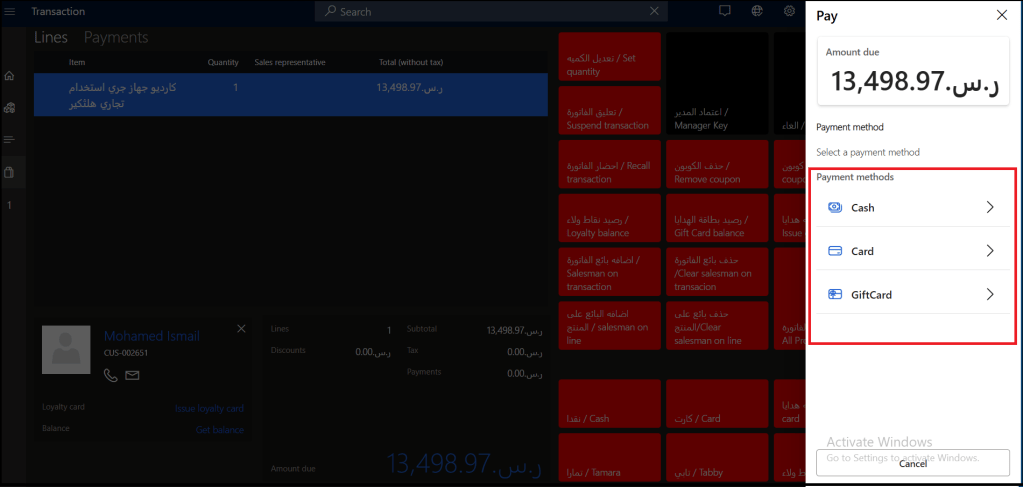
- Only the payment methods included in the assigned Payment Profile are displayed.
- The payment methods appear in the configured display order.
- Other registers in the same store continue using their own Payment Profiles, allowing each register to have a different payment experience.
Register Before Payment Profile
- Register After Payment Profile
Important Notes
Before troubleshooting, keep these points in mind:
- A payment method must first be configured at the store (channel) level.
- Adding a payment method to a Payment Profile does not automatically make it available in POS.
- If no Payment Profile is assigned to a register, the register uses the default payment methods configured for the store.
- Always run Distribution Schedule 1090 after assigning or modifying a Payment Profile.
Best Practice
Use Payment Profiles to design payment experiences based on the purpose of each register rather than giving every register access to every payment method. This keeps the POS interface clean, reduces cashier mistakes, and improves transaction speed while still allowing specialized registers to support additional payment options when needed.
Conclusion
Payment Profiles are a simple but powerful feature in Dynamics 365 Commerce that help retailers control the payment experience at the register level. By configuring different profiles for different types of registers, businesses can simplify cashier operations, improve usability, and ensure that each register displays only the payment methods required for its role.


 DynamicsSparks
Leave a comment